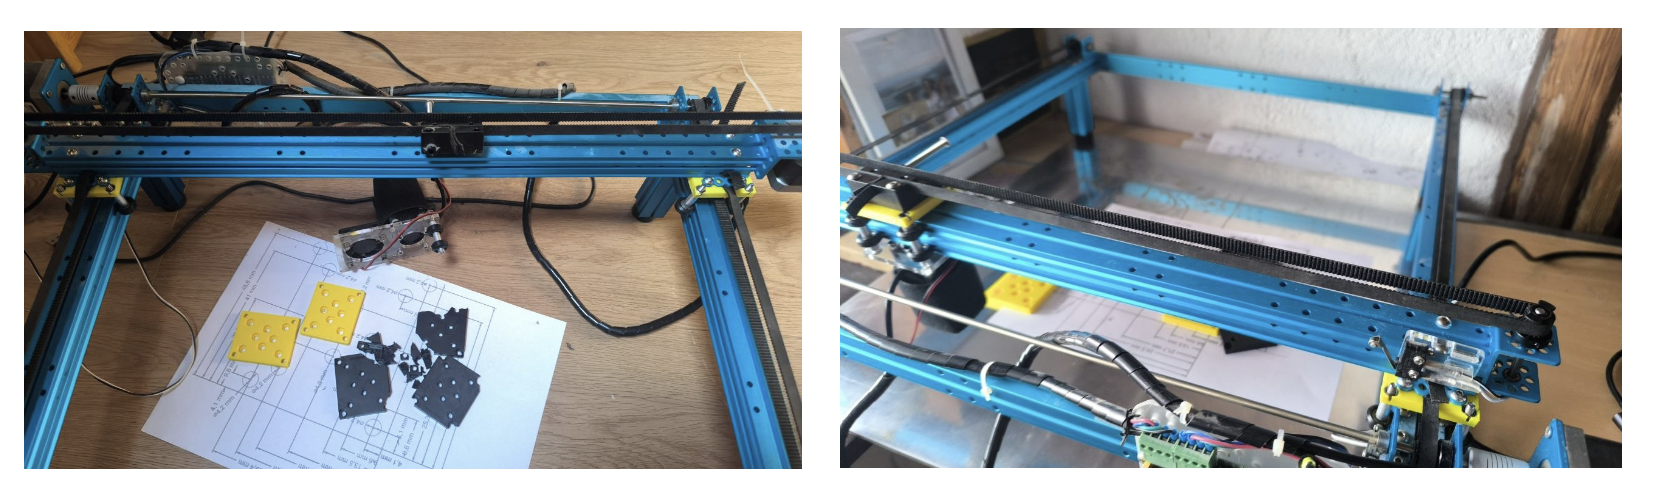
Belt Holders · Makeblock Laser ✅ printed
🖨️ Replacement belt holders for the Makeblock laser cutter (2015)
designed in FreeCAD · printed on Creality Ender 3 V3 PlusThe journey
I recently got my first 3D printer and have been learning the ropes by printing parts for other projects — Pi Cam boxes, cases for Pi 4 / 5 / 3, flex cam mounts, tilt‑pan mounts, and components for my SO‑ARM101 robot arm. After dozens of downloaded models, I felt ready to try my own design.
- ✅ Pi Cam boxes
- ✅ Pi 4 / Pi 5 / Pi 3 cases
- ✅ Flex cam mounts
- ✅ Tilt‑pan mounts
- ✅ SO‑ARM101 arm parts
Design & CAD
My first self‑designed part was a simple stencil — just a silhouette extruded to 3D. Easy enough. But the real challenge came next: designing replacement belt holders for an old Makeblock laser cutter (circa 2015) whose original PA (polyamide) parts had become brittle as glass and were falling apart.
01Measure the broken part
With a Mitutoyo caliper I measured the crumbling originals. The plate is symmetric — all four wheel holes sit exactly 4.1 mm from each edge, and all holes are 4.1 mm diameter (M4 clearance). Overall plate: 50.6 × 43.4 × 6 mm.
02Sketch in FreeCAD
Started with a fully‑constrained rectangle, padded to 6 mm, then added the four corner holes as a second sketch on the top face — pocketed through‑all. The hex nut traps (4 mm deep from the back face) came last.
03Hex nut traps — the interesting bit
The original part used hexagonal pockets to capture M4 nuts so they can't spin during assembly — a classic 3D‑print trick. I modelled them as 8 mm across‑flats hex pockets, 4 mm deep. Lesson learned: next version uses 8.2 mm — PETG shrinks slightly and the nuts were a tight push.
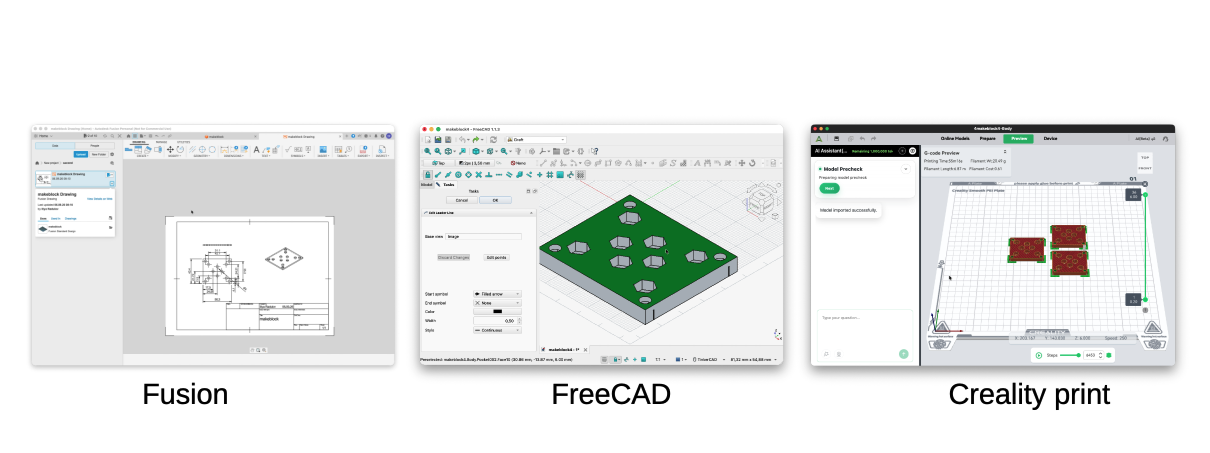
Print & result
Sliced in Creality Print, sent wirelessly to the Ender 3 V3 Plus. The printer ran its automatic bed‑levelling routine, and ~31 minutes later the parts were done. Both pieces came out clean — holes in the right positions, hex pockets functional, overall dimensions spot on.
With a little persuasion the M4 nuts went in. It's surprisingly satisfying to see something you designed on screen become a physical object that actually works.
Why PETG over the original PA?
The original parts were moulded in PA (polyamide / nylon). PA becomes brittle with age and UV exposure — exactly what happened here after ~10 years. PETG is tougher, more impact‑resistant, and holds up better long‑term for indoor mechanical parts. The replacement should outlast the machine itself.
The next challenge
Now that the mechanical parts are ready, the real work begins: getting the laser cutter back to life. The original control software (mLaser) hasn't been updated since 2017 and is Windows‑only — turns out that's a whole story on its own, ending with a decision to replace the controller entirely.
The original repo is still on GitHub — Makeblock-official/MLaser (2017, open source). If you've revived old Makeblock gear, I'd love to hear your approach.